Red velvet cake with cheese cream
 6 servings
1 hour 30 min
The world-famous Red Velvet cake with bright scarlet cakes and white cream is a true masterpiece of culinary art. Following the advice from our recipe, the cooking process will provide plenty of fun. And the taste of the finished cake will be remembered forever.
Wheat flour - 340 gr, Vegetable oil - 300 ml, Kefir - 280 ml, Sugar - 200 gr, Eggs - 3 pcs., Cocoa powder - 1 tbsp., Baking powder - 2 tsp., Baking soda - 1 tsp., Salt - 0.25 tsp., Food dye - 1 tsp., Curd cheese - 350 gr., Butter - 115 gr., Powdered sugar - 100 gr.
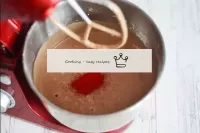 Add the scarlet food dye and mix thoroughly. If you have a gel dye, then it must be added first 1 tbsp. l, and then to the desired dough color. I have a fat-soluble powder dye. You can add it not immediately to the dough, but for example, pour not all kefir into the dough, but leave part and dissolve the dye in it. And then pour the colored kefir into the finished dough and stir.
  As a result, a bright scarlet mixture should turn out. Note that when baking, the dough will become a little darker. Depending on the amount and color and texture of the dye. If you need a certain color of cake, then it is better to consult with the seller when choosing a dye. Leave the dough for 20 minutes to react with the kefir.
 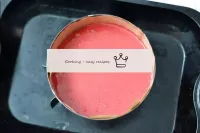 Cover the bottom of the split mold (Ø 18-20 cm) with parchment greased with butter. Do not lubricate the walls with anything. Pour the dough into the tin. Bake the scarlet biscuit in the oven preheated to 180 ° C for about 50 minutes until dry toothpick. For the first 30 minutes, it is better not to open the oven so that the sponge does not settle. The exact timing of baking depends on your oven.
 Read all the secrets of making a tall, beautiful, lush biscuit in an article about biscuit dough.
Keep in mind that everyone has different ovens. The temperature and cooking time may differ from those indicated in the recipe. To make any baked dish successful, use useful information about the features of the ovens!
Be prepared for the fact that flour may be needed more or less than indicated in the recipe. Focus not on the amount of flour, but on the desired consistency of the dough. To avoid mistakes, read about flour and its properties!
 Español
 Français
 Português
 Русский
 简体中文
简体中文 繁體中文
繁體中文 日本語
日本語 한국어
한국어 العربية
 Türkçe
 Қазақ
Қазақ Deutsch
 Italiano
 Українська
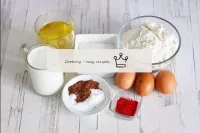 How to make Red Velvet cake? First, prepare the necessary ingredients for the dough. Kefir and eggs should be at room temperature, so get them out of the fridge in advance.
  Sift flour, cocoa, baking powder, soda and salt into a bowl. If you want a brighter bark color, then replace the cocoa with another 1 tbsp. l flour. With cocoa, the dough will turn out with a brownish tint. But at the same time with a small chocolate note.
  Add the eggs, vegetable oil and kefir to the flour mixture.
 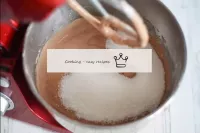 Mix the mixture well with a mixer until smooth, pouring sugar. You can beat the dough with a mixer or a kitchen machine with a special K-shaped dough nozzle.
 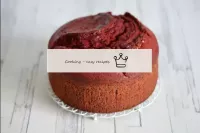 Cool the finished biscuit on a grill. Cut the semicircular top from the bark.
 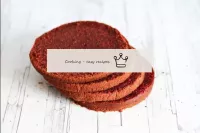 Cut the biscuit lengthwise into 3-4 barks. Where the dough came into contact with the mold, the bark will be brownish, so it makes sense to cut the edge with a slightly smaller diameter culinary ring or a knife at the bark.
 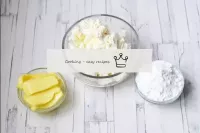 Now make the cream. The oil must be at room temperature.
 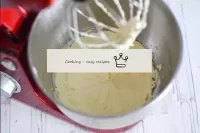 Whisk the soft butter with a icing sugar mixer until fluffy.
 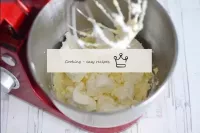 Add the creamy creme cheese.
 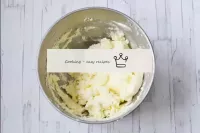 Stir until smooth. You don't need to beat too long, otherwise the whey will separate from the cheese and the cream will separate. Transfer the cream to a pastry bag with a wide round attachment.
 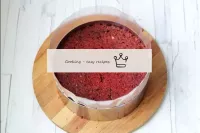 Assemble the cake by folding the corgi of the arcs on top of each other and layering it with cream.
 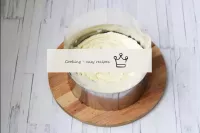 It is better to do this in a detachable form laid at the edges with an acetate film (a regular baking sleeve is also suitable).
 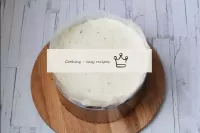 If desired, line the top and sides of the cake with the rest of the cream. I only leveled the top. I wanted the layers of cake and cream to be visible. Therefore, I removed the culinary ring just before serving the cake to the table.
 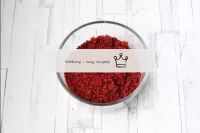 Break the cut top of the biscuit into pieces and dry in the oven, then grind in a blender into crumbs. Sprinkle with shredded biscuit crumbs the areas of cake you need (I only have that top).
 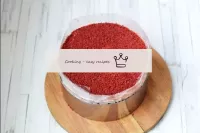 Place the cake in the fridge overnight for soaking, covering the top with cling film (the film should not touch the top of the cake).
 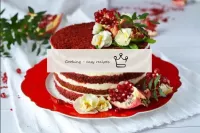 Garnish the finished cake as desired. I decorated with sprigs of greens, pomegranate grains and flowers. Enjoy your meal!